How to Make a Slim Paper Wallet at Home

July 09, 2017 2 Comments

How to Make a Slim Paper Wallet at Home


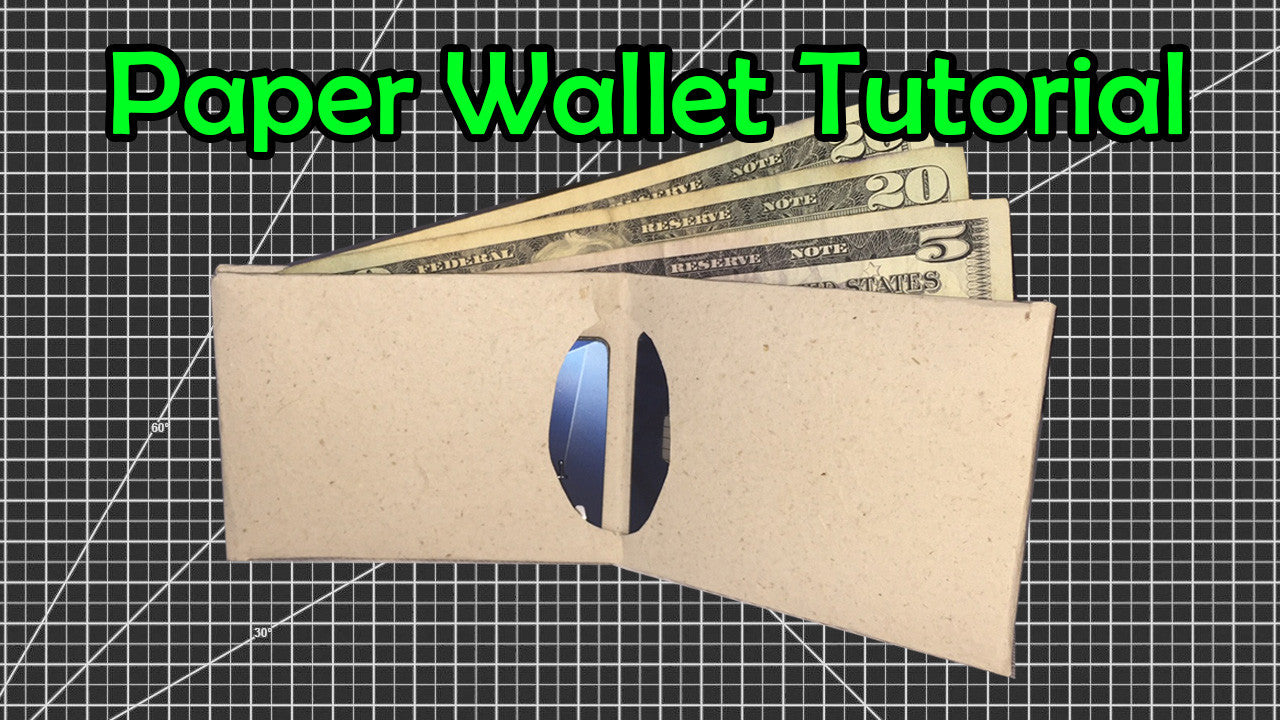
We love arts & crafts projects here at Green Banana. We are constantly exploring new ways to apply origami techniques to our wallets. Although this one won't be making it into the shop anytime soon, we want you to be able to make your own wallet at home! This wallet requires no glue or tape, but you can add those in to increase the durability of the wallet.

This project was made using a composite of recycled consumer (printer) paper and banana fiber paper. Any 8.5" by 11" paper will do, but thicker papers will result in a higher quality paper wallet. You can also buy banana fiber paper here if you'd like to try our material out for this or any other home paper craft projects.

Take advantage of a rainy day with your children, friends or just be creative!

Here is the full video with detailed instructions below the video:

Step 1: Hamburger Fold

  • Line up your corners and fold the paper in half like a hamburger (as opposed to a hotdog).
  • Neatly crease the edge while keeping the corners lined up.

Step 2: Fold Each End Into the Middle

  • Open the paper from our hamburger fold in Step 1.
  • Neatly fold and crease each end into the center crease we made in Step 1.

Step 3: Fold the Outside Edges Together Along the Center Crease

  • Fold along the original crease so that the paper is now 1/4 the original size.
  • Crease the edges well.

Step 4: Creating the Wallet Shape

  • Rotate the paper 90 degrees and fold in half to create the traditional wallet shape.
  • Crease all the edges well.
  • Unfold the paper in preparation for Step 5.

Step 5: Making the End Flap Cuts

  • Open the paper and make 3/4" cuts on each of the marked green lines.
  • These will be used to create flaps that will secure both ends of the wallet.

Step 6: Creating the Credit Card Slots

  • Fold the paper in half like a hotdog and make a cut along the 3rd section from the top.
  • Leave 1/4" on either end of your cut (red lines) to make the wallet stronger and more durable.
  • Cut out the green section to create the credit card opening (any shape you want!).

Step 7: Folding the Flaps

  • Turn the paper so that the credit card slot is now on the 3rd section from the top.
  • Fold the flaps from the 2nd and 4th sections inwards and crease well.

Step 8: Refolding the Wallet

  • Rotate the paper 90 degrees so that the credit card slot (3rd section) is closer to your right hand.
  • While keeping your flaps from the 2nd and 4th section folded in, bring the edges of the paper into the center crease just like we did in Steps 2.
  • Repeat Steps 3 and 4 so that the credit card slots are now inside the wallet.

Step 9: Trim the Flaps

  • Securing the end flaps is the hardest part, trim the corners to make the next step easier.
  • Only take off a little bit off the corners.

Step 10: Securing the Inner Flap

  • Now for the tricky part.
  • There are two flaps on each end to help secure the wallet.
  • First, find the inner flap and inner pocket.
  • Fold the inner flap back and forth so that it is pliable.
  • Work the inner flap into the inner pocket and crease.
  • You can either do this to both ends now or do Steps 10 and 11 one end at a time.

Step 11: Secure the Outer Flap

  • With the inner flap secured now we can finish one end.
  • First, find the outer flap and outer pocket.
  • Fold the outer flap back and forth so that it is pliable.
  • Work the outer flap into the outer pocket and crease.
  • Repeat for both ends of the wallet.
  • Fold back into the wallet shape and make sure you have creased all of the edges well.
  • You're Finished!


    Final Notes:

    This wallet can hold tons of cash and many credit cards.

    The thicker the paper the better to hold everything together.

    For extra durability, tape the folds inside their pockets so that the ends do not come undone.

    Please share, comment and post your wallets!


    2 Responses

    adriana Fantes
    adriana Fantes

    December 07, 2018

    this is the neatest and the slimmest wallet i have found. (and i have looked at many) The tutorial is very good .I buy the paper from Michaels make a wallet and I give it to my grand children, a couple of fives, , a couple of ones and a starbucks credit card on one side plus a card from Grandma with my telephone number. You know how busy they are and like this it makes it easy to call me.

    Carla vdM
    Carla vdM

    July 14, 2017

    A great Origami-wallet and good video on how to fold it.
    The 1st step “hamburger-fold” made me laugh, you invented a new word for just folding the paper in half ;o)

    Leave a comment

    Comments will be approved before showing up.


    Also in Blog

    Green Banana Paper and UN Sustainable Development Goal 8
    Green Banana Paper and UN Sustainable Development Goal 8

    August 09, 2019

    This is a piece in a segment examining the UN Sustainable Development Goals (SDGs) and Green Banana Paper. All information about the SDGs is based on information from the Sustainable Development Goals Knowledge Platform.

    Continue Reading

    Green Banana Paper and UN Sustainable Development Goal 1
    Green Banana Paper and UN Sustainable Development Goal 1

    July 05, 2019

    This is the first piece in a segment examining the UN Sustainable Development Goals (SDGs) and Green Banana Paper. All information about the SDGs is based on information from the Sustainable Development Goals Knowledge Platform. 

    Continue Reading

    Make a bold impression with banana paper business cards
    Make a bold impression with banana paper business cards

    June 07, 2019

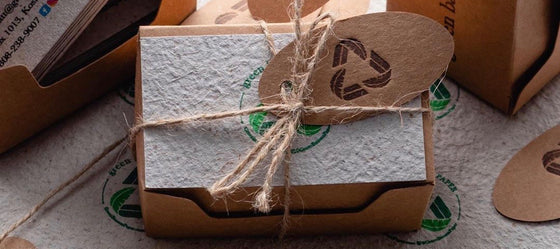
    Custom business cards have become one of our most popular items, particularly with businessmen and women who understand the importance of a smaller carbon footprint.

    Continue Reading